How to Create Embroidery Files from Images
- Toheed Antaal
- Mar 27
- 2 min read

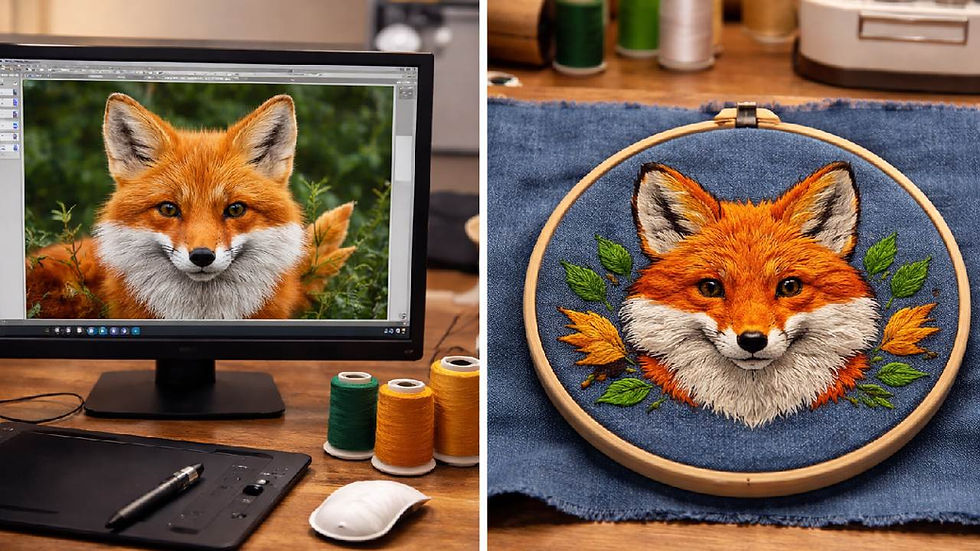
Embroidery machines allow you to turn digital designs into stitched artwork, but they cannot read standard image files directly. To make your design machine-ready, you need to convert image to embroidery file. This process involves digitizing your artwork into precise stitch instructions.
Understanding the Conversion Process
Unlike printing, embroidery relies on stitches rather than pixels. Machines need detailed instructions on stitch placement, density, and direction. When you convert image to embroidery file, you are transforming a visual design into a format the machine can interpret and execute accurately.
Selecting an Appropriate Image
The success of your embroidery design depends on the image you start with. Simple graphics with clean lines and limited colors work best. Logos and vector-style artwork are ideal because they retain clarity when stitched.
Highly detailed images or photographs often require simplification. Reducing unnecessary details before digitizing improves stitching quality and minimizes errors.
Digitizing Your Design
Digitizing software is essential to create embroidery-ready files. Tools like Wilcom, Hatch, and Brother PE Design allow you to convert images into stitch patterns.
The process generally involves:
Importing your image into the softwareResizing it to fit your embroidery frameTracing the design manually or using auto-digitizing featuresAssigning stitch types to each sectionAdjusting stitch direction and density
Manual adjustments usually yield more precise results compared to fully automatic digitizing.
Choosing the Right Stitch Types
Different parts of a design require different stitches. Satin stitches are suitable for text and borders, fill stitches cover larger areas, and running stitches handle fine outlines.
For a raised effect, 3D Puff Embroidery Digitizing can be applied. This adds dimension and makes the design stand out, particularly on caps and jackets.
Exporting to a Compatible Format
After digitizing, save the design in a format your embroidery machine supports, such as DST, PES, or EXP. Using the correct format ensures smooth operation and accurate stitching.
Testing Your Embroidery File
Testing is an important step before full production. Preview the design in your software and run a sample stitch on fabric. This helps identify issues like uneven stitching, thread breaks, or density problems, allowing you to make corrections before production.
Tips for Better Results
Keep designs simple and clearAvoid small, intricate detailsMatch stitch density to the fabric typeTest your file before large runs
Conclusion
Knowing how to convert image to embroidery file is essential for producing professional embroidery designs. With proper digitizing techniques, careful image selection, and thorough testing, you can create embroidery files that stitch smoothly and deliver high-quality results across a variety of fabrics.
EMDigitizer offers practical embroidery tools, including cost calculators, stitch count calculators, and simulators, which help hobbyists and professionals save time, estimate projects accurately, and create high-quality embroidery with ease.Visit now: EM Digitizer


Comments